3 Building a Block
The first version of Snap! was called BYOB, for “Build Your Own Blocks .” This was the first and is still the most important capability we added to Scratch . (The name was changed because a few teachers have no sense of humor. ☹ You pick your battles.) Scratch 2.0 and later also has a partial custom block capability.
Simple Blocks
In every palette, at or near the bottom, is a button labeled “Make a block .” Also, floating near the top of the palette is a plus sign. Also, the menu you get by right-clicking on the background of the scripting area has a “make a block” option.

Clicking any of these will display a dialog window in which you choose the block’s name, shape, and palette/color. You also decide whether the block will be available to all sprites, or only to the current sprite and its children.
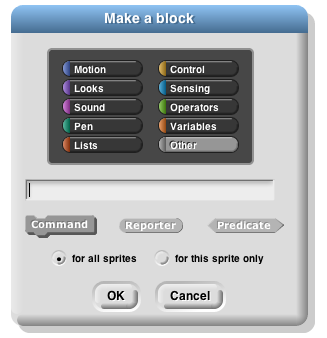
In this dialog box, you can choose the block’s palette, shape, and name. With one exception, there is one color per palette, e.g., all Motion blocks are blue. But the Variables palette includes the orange variable-related blocks and the red list-related blocks. Both colors are available, along with an “Other” option that makes grey blocks in the Variables palette for blocks that don’t fit any category.
There are three block shapes , following a convention that should be familiar to Scratch users: The jigsaw-puzzle-piece shaped blocks are Commands, and don’t report a value. The oval blocks are Reporters, and the hexagonal blocks are Predicates, which is the technical term for reporters that report Boolean (true or false) values.
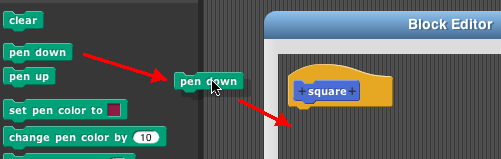
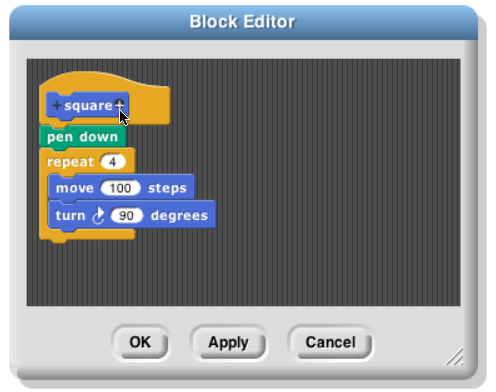
Suppose you want to make a block named “square” that draws a square. You would choose Motion, Command, and type “square” into the name field. When you click OK, you enter the Block Editor . This works just like making a script in the sprite’s scripting area, except that the “hat” block at the top, instead of saying something like “when I am clicked,” has a picture of the block you’re building. This hat block is called the prototype of your custom block.[3] You drag blocks under the hat to program your custom block, then click OK:

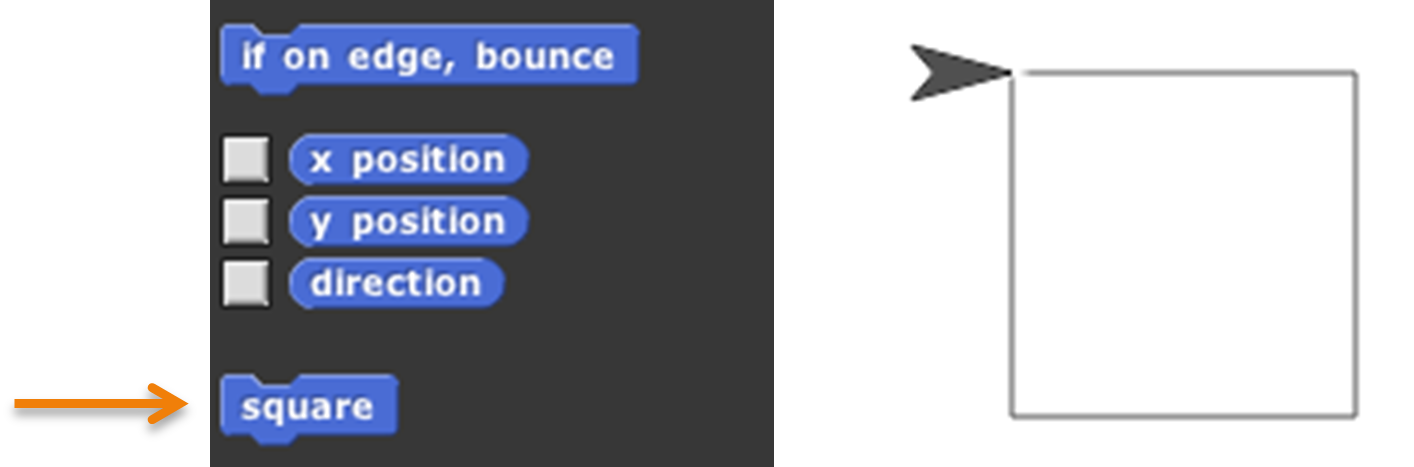
Your block appears at the bottom of the Motion palette. Here’s the block and the result of using it:
Custom Blocks with Inputs
But suppose you want to be able to draw squares of different sizes. Control-click or right-click on the block, choose “edit,” and the Block Editor will open. Notice the plus signs before and after the word square in the prototype block. If you hover the mouse over one, it lights up:
Click on the plus on the right. You will then see the “input name” dialog :
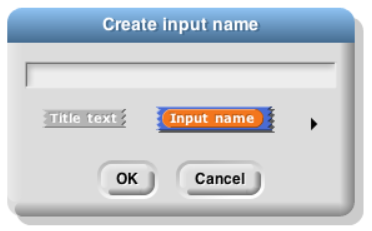
Type in the name “size” and click OK. There are other options in this dialog; you can choose “title text ” if you want to add words to the block name, so it can have text after an input slot, like the “move ( ) steps” block. Or you can select a more extensive dialog with a lot of options about your input name. But we’ll leave that for later. When you click OK, the new input appears in the block prototype:

You can now drag the orange variable down into the script, then click okay:
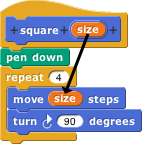
Your block now appears in the Motion palette with an input box:  You can draw any size square by entering the length of its side in the box and running the block as usual, by clicking it or by putting it in a script.
Editing Block Properties
What if you change your mind about a block’s color (palette) or shape (command, reporter, predicate)? If you click in the hat block at the top that holds the prototype, but not in the prototype itself, you’ll see a window in which you can change the color, and sometimes the shape, namely, if the block is not used in any script, whether in a scripting area or in another custom block. (This includes a one-block script consisting of a copy of the new block pulled out of the palette into the scripting area, seeing which made you realize it’s the wrong category. Just delete that copy (drag it back to the palette) and then change the category.)
If you right-click/control-click the hat block, you get this menu:
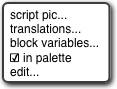
Script pic exports a picture of the script. (Many of the illustrations in this manual were made that way.) Translations opens a window in which you can specify how your block should be translated if the user chooses a language other than the one in which you are programming. Block variables lets you create a variant of script variables for this block: A script variable is created when a block is called, and it disappears when that call finishes. What if you want a variable that’s local to this block, as a script variable is, but doesn’t disappear between invocations? That’s a block variable . If the definition of a block includes a block variable, then every time that (custom) block is dragged from the palette into a script, the block variable is created. Every time that copy of the block is called, it uses the same block variable, which preserves its value between calls. Other copies of the block have their own block variables. The in palette checkbox determines whether or not this block will be visible in the palette. It’s normally checked, but you may want to hide custom blocks if you’re a curriculum writer creating a Parsons problem. To unhide blocks, choose “Hide blocks” from the File menu and uncheck the checkboxes. Edit does the same thing as regular clicking, as described earlier.
Recursion
Since the new custom block appears in its palette as soon as you start editing it, you can write recursive blocks (blocks that call themselves) by dragging the block into its own definition:

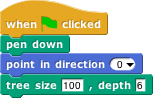
(If you added inputs to the block since opening the editor, click Apply before finding the block in the palette, or drag the block from the top of the block editor rather than from the palette.)
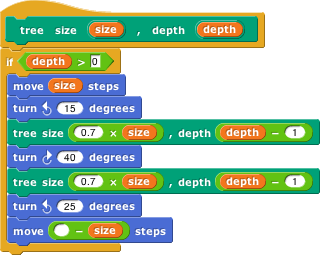
If recursion is new to you, here are a few brief hints: It’s crucial that the recursion have a base case , that is, some small(est) case that the block can handle without using recursion. In this example, it’s the case depth=0, for which the block does nothing at all, because of the enclosing if. Without a base case, the recursion would run forever, calling itself over and over.
Don’t try to trace the exact sequence of steps that the computer follows in a recursive program. Instead, imagine that inside the computer there are many small people, and if Theresa is drawing a tree of size 100, depth 6, she hires Tom to make a tree of size 70, depth 5, and later hires Theo to make another tree of size 70, depth 5. Tom in turn hires Tammy and Tallulah, and so on. Each little person has his or her own local variables size and depth, each with different values.
You can also write recursive reporters , like this block to compute the factorial function:
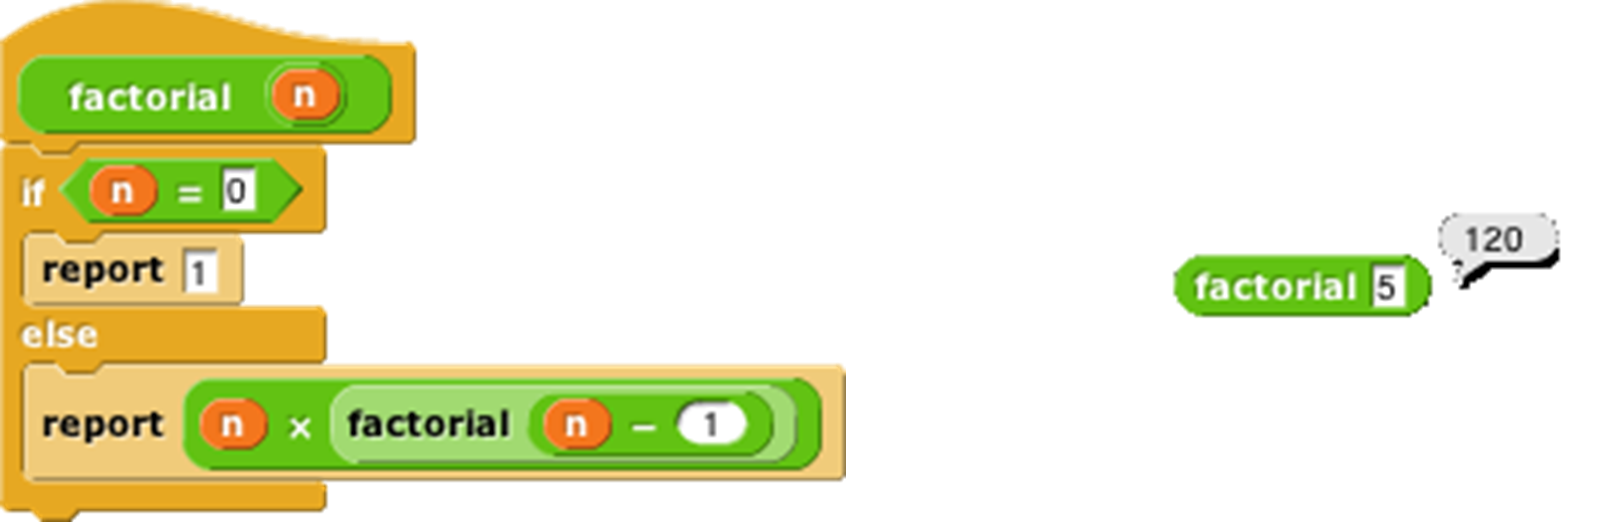
Note the use of the report block . When a reporter block uses this block, the reporter finishes its work and reports the value given; any further blocks in the script are not evaluated. Thus, the if else block in the script above could have been just an if, with the second report block below it instead of inside it, and the result would be the same, because when the first report is seen in the base case, that finishes the block invocation, and the second report is ignored. There is also a stop this block block that has a similar purpose, ending the block invocation early, for command blocks. (By contrast, the stop this script block stops not only the current block invocation, but also the entire toplevel script that called it.)
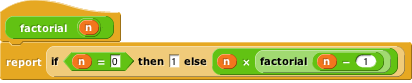
Here’s a slightly more compact way to write the factorial function:
For more on recursion, see Thinking Recursively by Eric Roberts . (The original edition is ISBN 978‑0471816522; a more recent Thinking Recursively in Java is ISBN 978-0471701460.)
Block Libraries
When you save a project (see Chapter II above), any custom blocks you’ve made are saved with it. But sometimes you’d like to save a collection of blocks that you expect to be useful in more than one project. Perhaps your blocks implement a particular data structure (a stack, or a dictionary, etc.), or they’re the framework for building a multilevel game. Such a collection of blocks is called a block library.
*To create a block library, choose “Export blocks…” from the File menu. You then see a window like this:
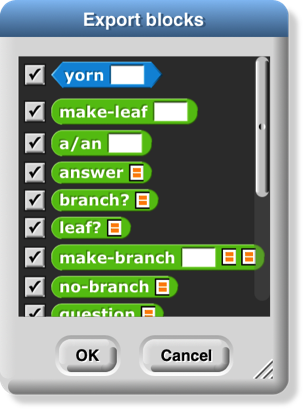
The window shows all of your global custom blocks. You can uncheck some of the checkboxes to select exactly which blocks you want to include in your library. (You can right-click or control-click on the export window for a menu that lets you check or uncheck all the boxes at once.) Then press OK. An XML file containing the blocks will appear in your Downloads location.
To import a block library, use the “Import…” command in the File menu, or just drag the XML file into the Snap! window.
Several block libraries are included with Snap!; for details about them, see page 25.
Custom blocks and Visible Stepping
Visible stepping normally treats a call to a custom block as a single step. If you want to see stepping inside a custom block you must take these steps in order:
Turn on Visible Stepping.

Select “Edit” in the context menu(s) of the block(s) you want to examine.
Then start the program.
The Block Editor windows you open in step 2 do not have full editing capability. You can tell because there is only one “OK” button at the bottom, not the usual three buttons. Use the button to close these windows when done stepping.